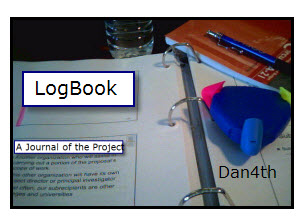
 Keep a Project Journal–A Log Book
The first step in starting a science fair project is to create a science journal, which is a written record showing all your work from start to the finish. Take pictures during each step of the project. A science fair project is for learning more about science and you learn more if you enjoy your work. So in addition to the photographs that can be used on your display to show your scientific work, you might add some fun photographs to your journal. Photographs of all helpers will make it easy for you to remember who assisted you so you can acknowledge them in your report.
Tips for Construction a Log Book
1. Use a binder so that more pages can be added or that the pages can be rearranged.
2. Use labeled tabs to organize and separate the different sections. (Suggestions for sections are below).
3.Date all entries and organize in order by date.
4.Include all research information.
5. Include all project experimental observations in order by date, and include time if appropriate.
6. Record your thoughts and questions during the entire study. Remember that this is your science diary.
7. Make the journal as neat, organized, and user-friendly as possible. But don’t rewrite any of the entries on a new page to make them look neater. If you do this, you might accidentally add or delete information. If you make a mistake, mark through it. Stains on the pages don’t matter.
8. Number each page after completing the journal.
9. Place a title page in the front of the journal. Check the fair rules about the information that can be included.
10. Prepare a table of contents listing the page number of each section.
Sections for your Log Book:
1. Project rules and regulations. This section contains all the printed information related to the project, including rules and deadlines for each step of the project.
2. Planning schedule. This can be a list of all the project steps, including organizing the journal and the dates when you plan to have them completed. It should also include the date the project is due. When planning your schedule, be sure your starting date gives you enough time to be finished before the due date. The calendar might include the following steps and deadlines:
Steps Deadline Date
1. Set up journal
2. Project topic selected
3. Project research completed
4. Project problem/question decided
5. Project Hypothesis stated
6. Project experiment designed
7. Project experiment completed and data recorded
8. Data Analyzed and Conclusion written
9. Project report completed
10. Project display completed
11. Project due
The remaining sections in the journal are steps in the order needed to design and develop your own project.
1. Topic. This section should include the categories and topics you are interested in. You might make a list of these, then narrow down the topic list to one specific topic. Include information about all the resources you used-magazines, books, online sources, etc.
2. Project research. This is research to help you understand the project topic. It will be helpful in expressing the project problem, proposing your hypothesis, and designing your project experiment. Include information about all the resources that you used, magazines, books, and so on. This information will be needed for the bibliography in your project report.
3.Project question Record all your ideas. Include all your revisions and the final Question Stated.
4. Project hypothesis Record all your hypothesis ideas with final Hypothesis stated.
5. Project experiment. This experiment is to answer the project question and test your hypothesis. Record the materials used as well as the procedure steps. Do record all changes.
6. Project data. This section includes all the data collected from experimental observations. It is important to date your entries. Include a time if it is needed. This information can be recorded in tables, diagrams, graphs, written descriptions, etc. It is very important to record detailed descriptions of your observations.
7. Data Analysis/Conclusion. This is your analysis of the experimental data. This means that you study the data graphs and charts and determine what what they mean. Use the data to answer the project question. Determine if the data supports your hypothesis. Remember that your data does not necessarily prove or disprove your hypothesis. Instead, it either does or doesn’t support your hypothesis. This section should contain all your ideas for the completed conclusion as well as your final copy.
8. Project Report. Include all your ideas for developing the report as well as well as your final copy.
9. Project Display. Keep all written plans and drawings about the display in this section. You may wish to include a series of pictures showing the development of the display.
10. Judging. Written copies of any oral presentations should be kept in this section. Also include information about rules for presentations, such as length of time, as well as information about how the projects will be judged.